Pie crust is a fundamental component of many delicious desserts, from fruit pies to savory quiches. Crafting the perfect pie crust may seem daunting, but using a food processor can simplify the process significantly. In this article, we will explore the benefits of using a food processor to make pie crust, discuss the essential ingredients, and provide step-by-step instructions, along with tips and techniques to elevate your baking game.
The Advantage of Using a Food Processor
Speed and Efficiency
Using a food processor to make pie crust is not just about convenience; it’s about efficiency. When you need to prepare a crust quickly, a food processor cuts down on the time required for mixing and blending ingredients. Instead of using a pastry cutter or your hands, which can be tiring and time-consuming, simply place all the ingredients in the bowl of the food processor and let the machine do the work. In just a few pulses, you can achieve perfectly blended dough.
Consistency
One of the biggest challenges when making pie crust by hand is achieving a uniform texture. When using a food processor, it’s much easier to ensure that fat is well-distributed throughout the flour. This helps to create a crust that is both flaky and tender. Additionally, the food processor minimizes the risk of overworking the dough, which can result in a tough crust.
Less Mess
If you’re someone who dreads the cleanup process after baking, a food processor can also simplify this aspect. Instead of having flour, butter, and other ingredients scattered all over your countertop, you can keep everything contained within the food processor’s bowl. This means fewer surfaces to clean up and a more streamlined process.
Essential Ingredients for Pie Crust
The Basics
To make a standard pie crust in a food processor, you’ll need the following ingredients:
- Flour: All-purpose flour is the most common choice for pie crusts, providing the necessary structure. However, you can also experiment with other types like whole wheat or gluten-free flours for different flavors and textures.
- Fat: Butter is the traditional choice due to its rich flavor, but you can also use shortening, lard, or a combination. Each type of fat brings its own unique qualities to the crust.
- Salt: A pinch of salt enhances the flavor of the crust, so don’t skip this ingredient.
- Liquid: Ice water is typically used to bind the dough. The cold temperature helps keep the fat from melting, which is crucial for a flaky texture.
Optional Ingredients
- Sugar: If you’re making a sweet pie, adding a tablespoon of sugar can elevate the crust’s flavor.
- Vinegar: A teaspoon of vinegar or lemon juice in the liquid can help tenderize the dough and improve its structure.
Step-by-Step Instructions to Make Pie Crust in Food Processor
Step 1: Gather Your Ingredients
Start by measuring out your ingredients. For a basic single-crust pie, you’ll need about 1 ½ cups of all-purpose flour, ½ cup of cold butter (cut into cubes), ¼ teaspoon of salt, and about 5-7 tablespoons of ice water.
Step 2: Combine Dry Ingredients
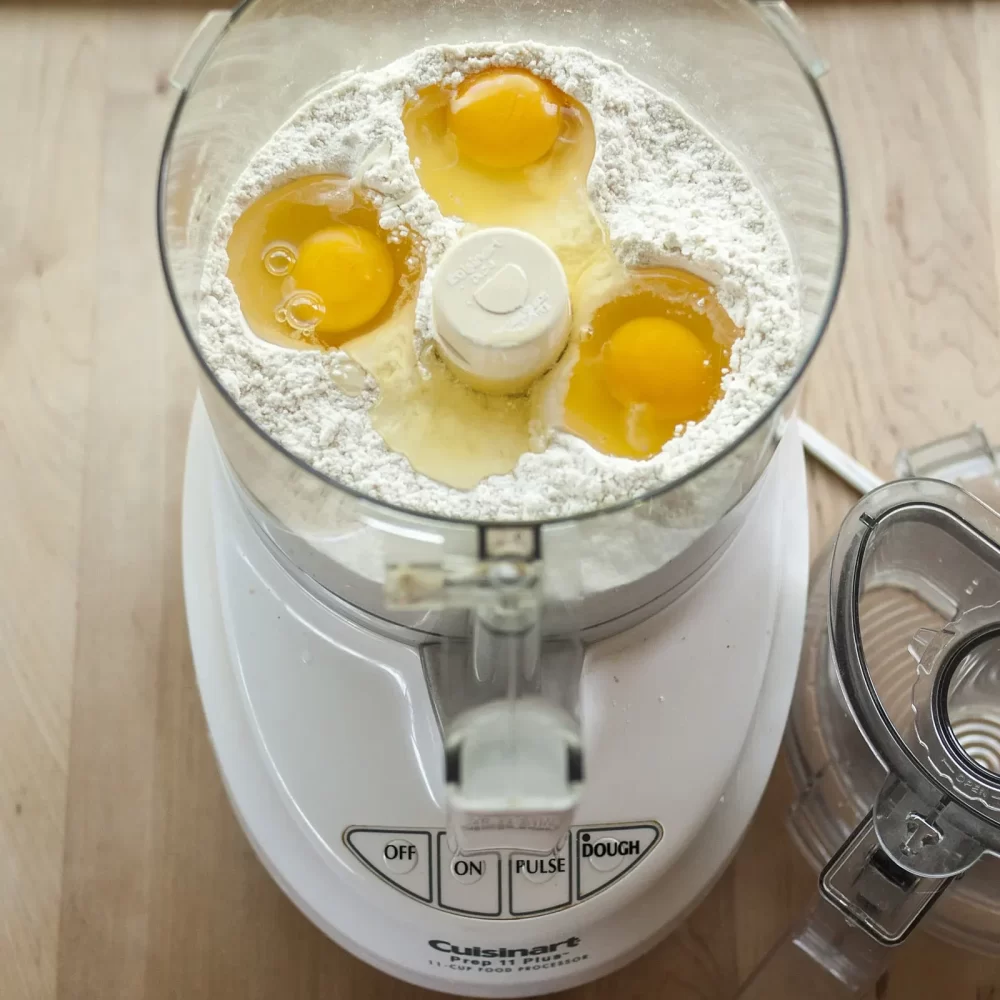
In the bowl of your food processor, combine your flour and salt. Pulse a couple of times to ensure everything is mixed evenly.
Step 3: Add the Fat
Next, add the cubed butter (or other fat) to the flour mixture. Pulse until the mixture resembles coarse crumbs. You’re looking for a texture where you can still see small pieces of fat mixed in with the flour. This is crucial for achieving a flaky crust. Remember, do not over-process; just a dozen or so short pulses should suffice.
Step 4: Incorporate the Liquid
Slowly add the ice water through the feed tube while pulsing the processor. Start with 5 tablespoons and increase if necessary. You want to add just enough water for the dough to come together without being sticky. Stop processing as soon as it starts forming, as over-mixing will develop the gluten and lead to a tough crust.
Step 5: Gather and Chill the Dough
Once the dough has formed, turn it out onto a floured surface. If it feels crumbly, don’t worry; just press it together with your hands. Shape the dough into a disc, wrap it in plastic wrap, and refrigerate for at least 30 minutes. Chilling the dough makes it easier to roll out and helps prevent shrinkage during baking.

Rolling Out the Dough
Preparing Your Workspace
After chilling, take the dough out of the refrigerator. Let it sit for a few minutes to soften slightly, which will make it easier to roll out. As you prepare to roll out your dough, ensure your workspace is clean and lightly floured to prevent sticking.
Rolling Technique
- Flour the Surface: Lightly dust your work surface and rolling pin with flour. This will help prevent the dough from sticking.
- Center the Dough: Place the chilled dough in the center of the floured surface. Flatten it slightly with your hands.
- Roll Out: Starting from the center, use even pressure to roll the dough outwards. Rotate the dough a quarter turn every couple of rolls to maintain a circular shape.
- Check for Thickness: Aim for an even thickness of about 1/8 inch. You can use rolling pin guides to help maintain the correct thickness.
- Transfer to Pie Dish: Once rolled out, carefully transfer the dough to your pie dish. You can use the rolling pin to assist in this process by rolling the dough around it and then unrolling it over the dish.
Crimping the Edges
The Final Touch
After placing the dough in your dish, you may notice some overhang. Trim the excess dough, leaving about an inch around the edges. You can fold this overhang under itself to create a thicker border, then crimp the edges for a decorative finish.
Techniques for Crimping
- Fork Method: Press the tines of a fork against the edge to create a textured look.
- Pinch Method: Use your fingers to pinch the dough between your thumb and forefinger, creating a scalloped appearance.
- Spiral Method: This involves twisting small sections of dough into spirals for a more intricate design.
Pre-baking Your Pie Crust
Why Pre-baking is Important
If you’re making a pie that has a custard or is filled with fruit that doesn’t require long baking, pre-baking the crust (also known as blind baking) is essential. This helps to avoid a soggy bottom.
How to Pre-bake
- Preheat the Oven: Preheat your oven to 375°F (190°C).
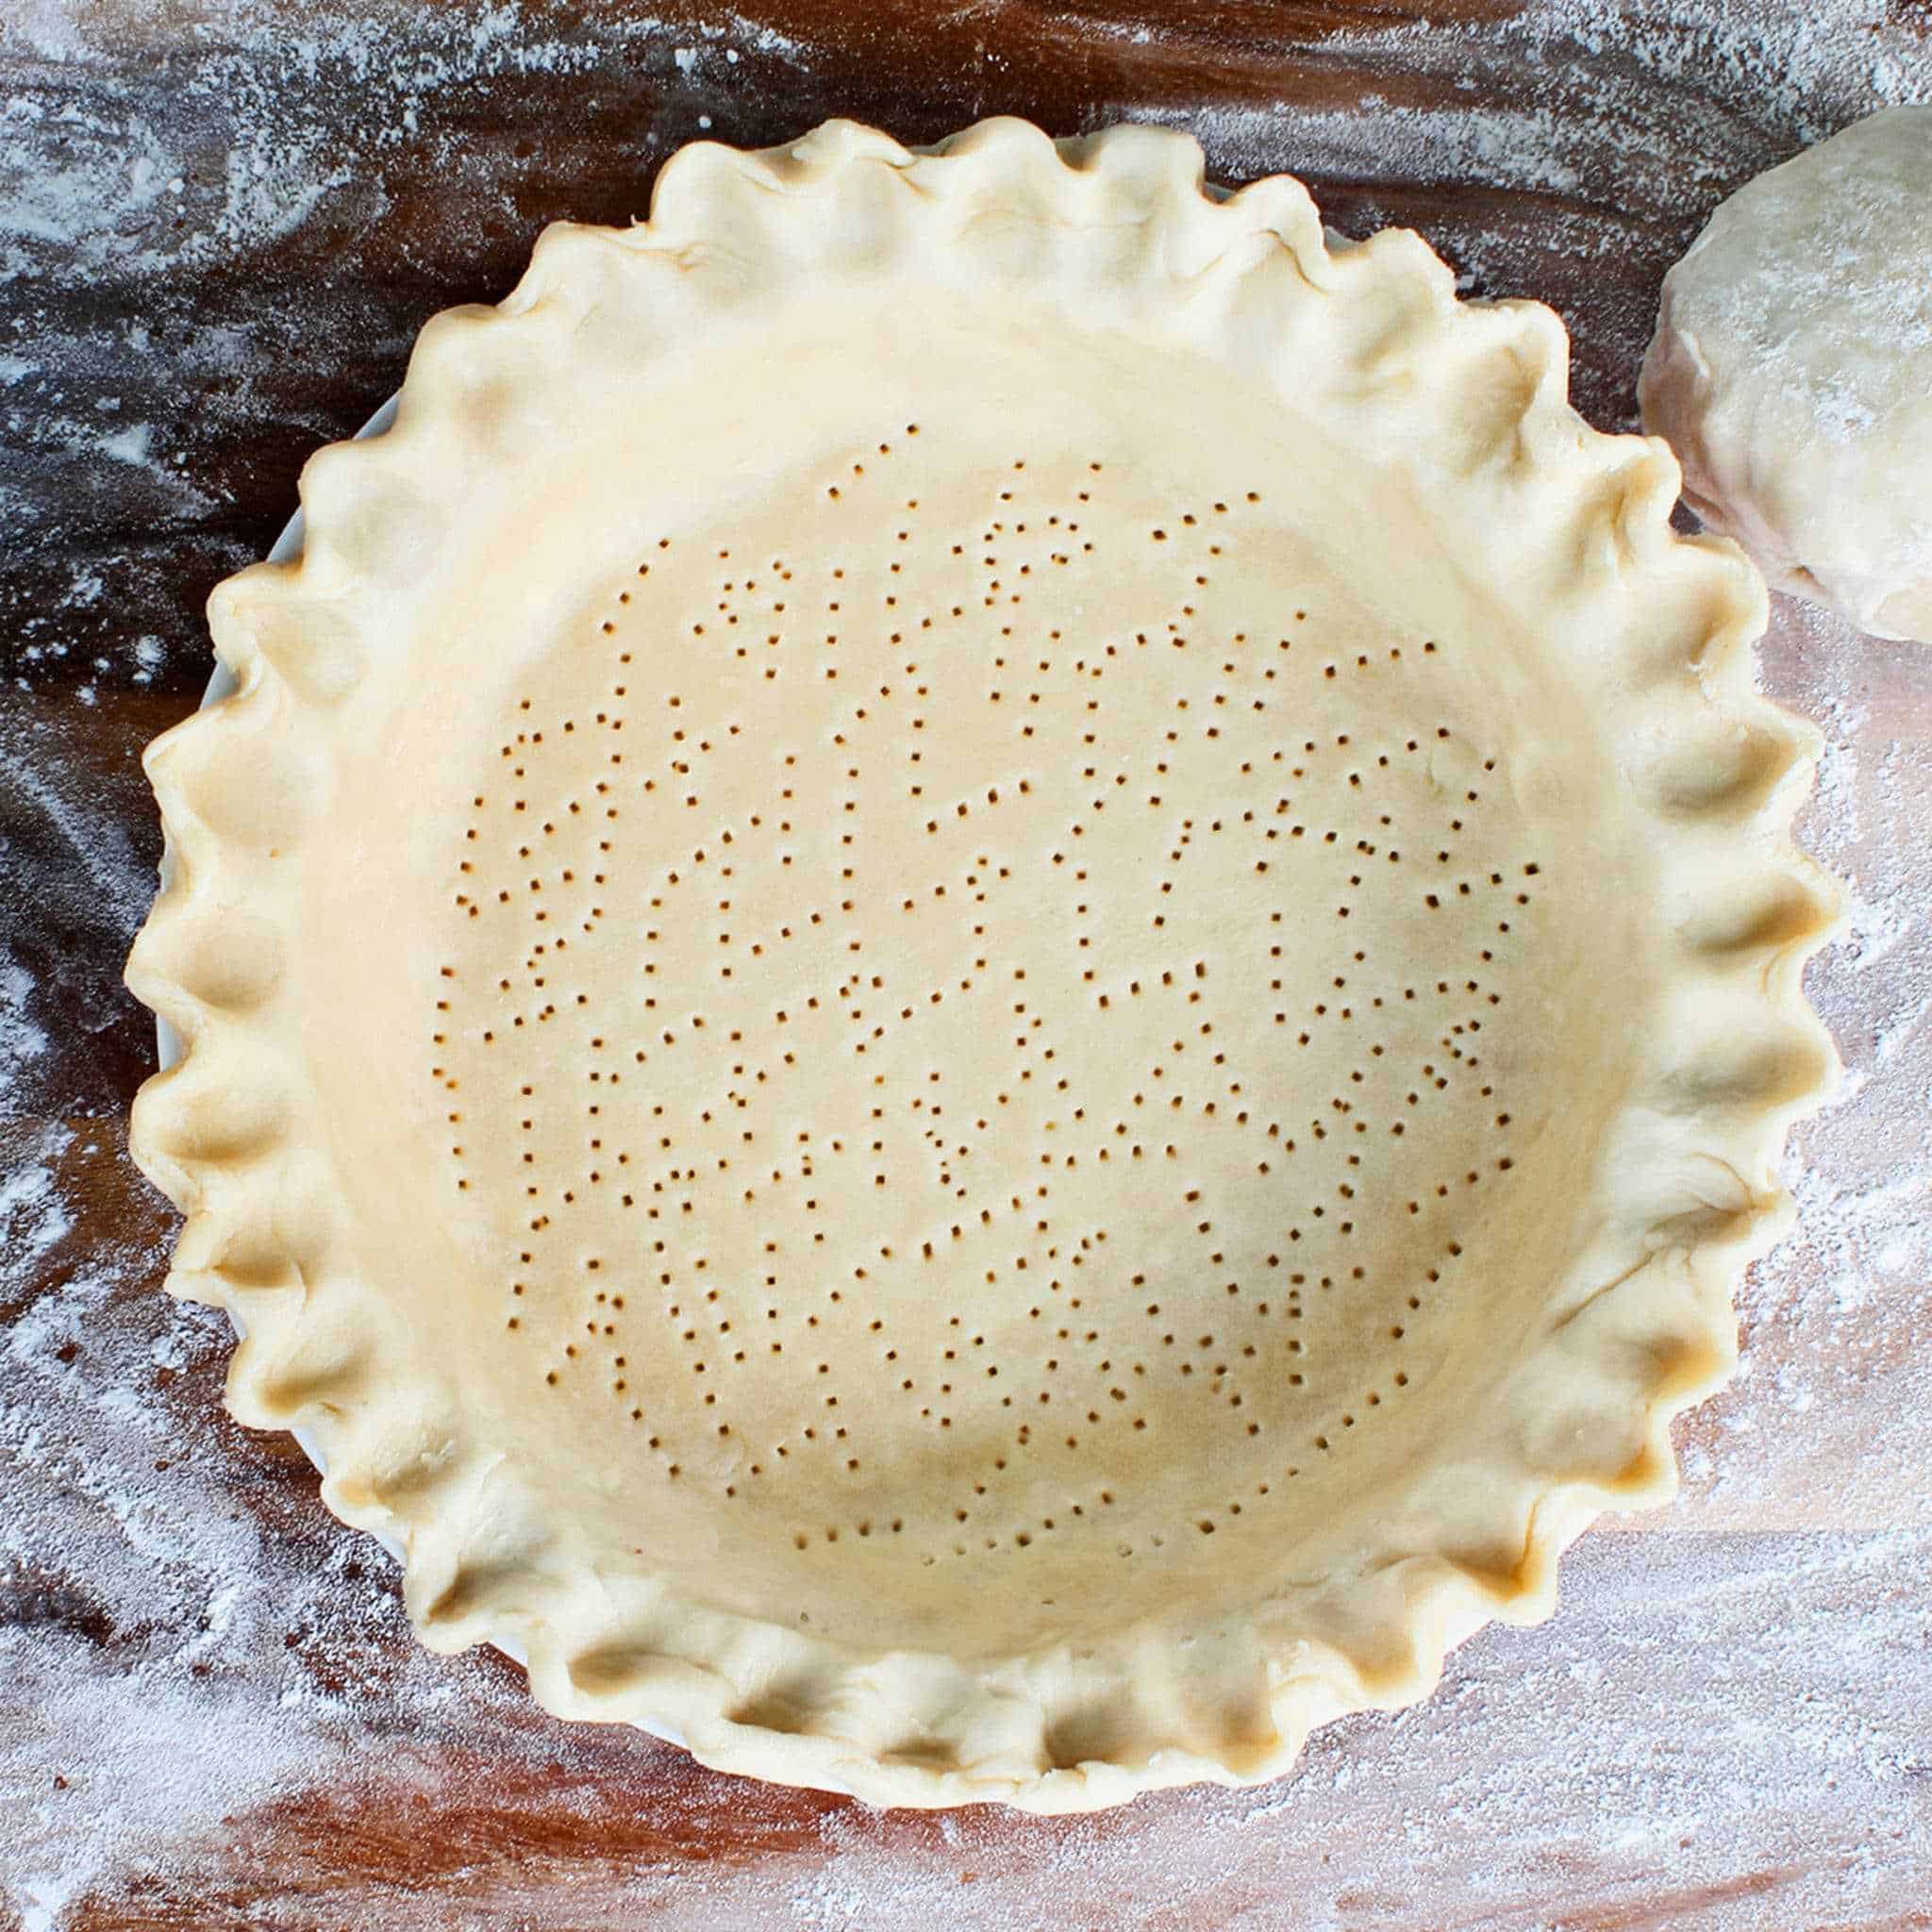
- Dock the Dough: Before baking, use a fork to poke several holes in the bottom of the dough. This technique, called docking, prevents the crust from puffing up while baking.
- Add Weights: Line the pie crust with parchment paper and fill it with pie weights, dried beans, or uncooked rice. This helps to keep the crust flat.
- Bake: Place the crust in the oven and bake for about 15-20 minutes. Keep an eye on it; you don’t want it to brown too much.
- Remove Weights: After 15-20 minutes, carefully remove the weights and parchment paper. Bake for an additional 5-10 minutes until golden brown.
Cooling the Crust
Allow the pie crust to cool completely before adding your filling. This helps maintain the integrity of the crust and prevents it from becoming soggy.
 Storing Pie Crust
Refrigerating Dough
If you’re not using the dough immediately, you can store it in the refrigerator for up to three days. Wrap it tightly in plastic wrap and ensure that it’s well-sealed to prevent it from drying out.
Freezing Dough
For longer storage, freeze the dough. Wrap the disk tightly in plastic wrap and then place it in a resealable plastic bag. You can store it in the freezer for up to three months. When ready to use, allow the dough to thaw in the refrigerator overnight before rolling it out.
Troubleshooting Common Issues
Dough Too Sticky?
If your dough feels sticky, this may be due to adding too much water or humidity in your kitchen. You can sprinkle in a little extra flour while working with it to help with stickiness.
Tough Crust?
A tough crust is often the result of overworking the dough or adding too much water. Always mix until just combined, and handle the dough as little as possible.
Crust Shrinks While Baking?
To prevent shrinking, make sure to chill the dough before rolling it out. Also, avoid stretching the dough when placing it in the pie pan.
Conclusion: The Art of Pie Crust in Food Processor
Making a pie crust in a food processor is not only efficient but also ensures a consistent and flaky result. The ability to streamline the mixing process allows even novice bakers to produce a beautiful pie crust that enhances any pie. With practice, anyone can master the art of pie crust making. Following the guidelines laid out in this article will not only elevate your baking skills but also enable you to create a wide range of delicious pies. Whether you’re preparing for a holiday gathering, a family dinner, or simply indulging in a sweet treat, the perfect pie crust begins with a food processor. Happy baking!