Introduction:
Making a milkshake without a blender may sound challenging, but with the right techniques and tools, it’s entirely possible to enjoy this classic treat without advanced kitchen gadgets. Whether your blender is broken, or you simply don’t own one, there are several methods to create a delicious, creamy milkshake using basic household items. This comprehensive guide explores various approaches, offering step-by-step instructions and tips to ensure your milkshake turns out perfectly every time.
How to Make a Milkshake Without a Blender:
What Are the Best Techniques?
Understanding the Basics of Milkshake Ingredients
Before diving into the techniques, it’s essential to understand the basic components that make up a milkshake.
Ice Cream: Ice cream is the base of most milkshakes, providing the creamy texture and rich flavor. Vanilla is the traditional choice, but you can use any flavor depending on your preference.
Milk: Milk is added to thin out the ice cream and create a smooth, drinkable consistency. Whole milk is commonly used for its richness, but you can also use 2%, skim, almond milk, or any other milk alternative.
Flavorings and Add-ins: To enhance the flavor, you can add ingredients like chocolate syrup, fresh fruit, cookies, or candy. Choose add-ins that complement the base ice cream flavor for an enjoyable combination.
Using a Mason Jar for Milkshake Making
The mason jar method is one of the most straightforward and effective techniques for making a milkshake without a blender.
Step 1: Prepare the Ingredients
Scoop Ice Cream: Place three to four scoops of your chosen ice cream into a large mason jar. The size of the jar should accommodate the ice cream while leaving enough space to add milk and shake the contents.
Add Milk: Pour about 1/2 cup to 3/4 cup of milk into the jar. You can adjust the amount of milk based on your desired shake thickness. Start with less milk if you prefer a thicker shake and add more as needed.
Incorporate Flavorings: Add any additional flavorings or mix-ins. For example, you can add two tablespoons of chocolate syrup for a chocolate milkshake or a handful of fruit for a fruity variation.
Step 2: Combine and Shake
Seal the Jar: Secure the lid tightly on the mason jar. Make sure it’s properly sealed to avoid any spills while shaking.
Shake Vigorously: Shake the jar vigorously for a few minutes. You’ll need to use a bit of muscle, but the effort will mix the ingredients thoroughly. Keep shaking until the ice cream is fully incorporated with the milk and the mixture is smooth and creamy.
Check Consistency: Open the jar and check the consistency. If it’s too thick, add a bit more milk and shake again. If it’s too thin, add another small scoop of ice cream and shake until you reach the desired thickness.
Step 3: Serve and Enjoy
Pour and Garnish: Pour the milkshake into a glass. Garnish with whipped cream, sprinkles, or a cherry on top if desired.
Reuse the Jar: The mason jar can serve as both a mixing container and a drinking vessel. Simply add a straw and enjoy directly from the jar for a convenient, no-mess treat.
Using a Hand Mixer for Milkshake Making
A hand mixer offers another effective way to make a milkshake without a blender, providing greater control over the mixing process.
Step 1: Prepare the Ingredients
Scoop Ice Cream: Scoop three to four generous scoops of ice cream into a large mixing bowl. Use a sturdy bowl that can withstand the mixing process.
Add Milk: Pour about 1/2 cup to 3/4 cup of milk into the bowl. Adjust the amount based on your preferred shake thickness.
Add Flavorings: Incorporate your chosen flavorings or mix-ins, such as chocolate syrup, fruit, or candy pieces.
Step 2: Blend with the Hand Mixer
Position the Mixer: Lower the hand mixer into the bowl, ensuring that the beaters are fully submerged in the ice cream mixture to prevent splattering.
Mix on Low: Start the hand mixer on a low setting to gently combine the ingredients. Gradually increase the speed to medium as the mixture begins to blend.
Achieve Desired Consistency: Mix until the ice cream is fully broken down and the mixture is smooth and creamy. Pause periodically to check the consistency and adjust the milk or ice cream as needed.
Step 3: Serve and Enjoy
Pour the Milkshake: Pour the blended milkshake into a glass. Carefully transfer the mixture to avoid spills.
Add Toppings: Top the milkshake with whipped cream, chocolate shavings, or any other garnishes you prefer.
Using an Immersion Blender for Milkshake Making
An immersion blender, also known as a stick blender, is another versatile tool that can effectively create a milkshake without a traditional blender.
Step 1: Prepare the Ingredients
Scoop Ice Cream: Place three to four scoops of ice cream into a tall container or mixing jar that’s suitable for use with an immersion blender.
Add Milk: Pour about 1/2 cup to 3/4 cup of milk into the container, adjusting the amount based on your desired consistency.
Incorporate Flavorings: Add any additional flavorings, such as chocolate syrup, vanilla extract, or fruit.
Step 2: Blend with the Immersion Blender
Submerge the Blender: Lower the immersion blender into the container, ensuring the blades are fully immersed in the ice cream and milk mixture.
Blend Until Smooth: Turn on the immersion blender and blend the ingredients until smooth and well combined. Move the blender up and down to ensure even mixing.
Check Consistency: Stop the blender and check the consistency. Adjust by adding more milk or ice cream as needed and blend again to reach the desired texture.
Step 3: Serve and Enjoy
Pour the Milkshake: Carefully pour the milkshake into a glass.
Garnish and Serve: Add toppings if desired and enjoy your freshly blended milkshake.
Utilizing a Whisk for Milkshake Making
For those without any electrical appliances, a whisk offers a manual method to make a milkshake.
Step 1: Prepare the Ingredients
Scoop Ice Cream: Place three to four scoops of ice cream into a large mixing bowl.
Add Milk: Pour about 1/2 cup to 3/4 cup of milk into the bowl.
Add Flavorings: Incorporate any additional flavorings or mix-ins.
Step 2: Whisk the Mixture
Start Whisking: Use a balloon whisk to begin whisking the ice cream and milk mixture. Use quick, consistent motions to break down the ice cream and incorporate the milk.
Whisk Vigorously: Continue whisking vigorously until the mixture becomes smooth and creamy. This process may take a bit longer and require some elbow grease, but the result will be worth the effort.
Check Consistency: Periodically check the consistency and adjust by adding more milk or ice cream as needed. Whisk again until you reach the desired thickness.
Step 3: Serve and Enjoy
Pour the Milkshake: Pour the milkshake into a glass using a spoon to guide the mixture.
Add Toppings: Garnish with your preferred toppings and enjoy.
Experimenting with Different Flavors and Add-ins
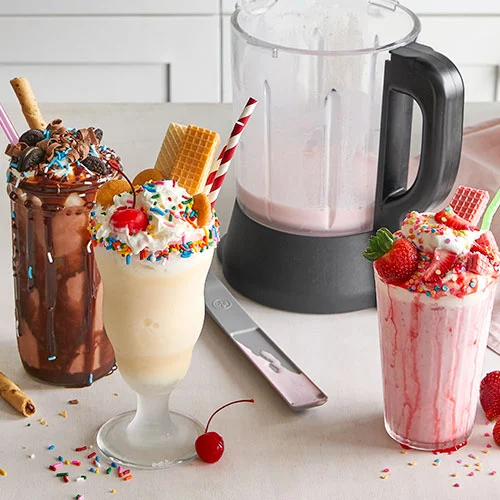
One of the joys of making milkshakes is experimenting with various flavors and add-ins to create unique combinations.
Chocolate and Peanut Butter: Combine chocolate ice cream with a tablespoon of peanut butter and a drizzle of chocolate syrup for a rich, indulgent treat.
Strawberry and Banana: Blend vanilla ice cream with fresh strawberries and half a banana for a fruity, refreshing shake.
Cookies and Cream: Add crushed Oreo cookies to vanilla ice cream and milk for a classic cookies and cream milkshake.
Mint Chocolate Chip: Use mint chocolate chip ice cream and add a sprinkle of mini chocolate chips for a cool, refreshing twist.
Tropical Delight: Combine pineapple chunks and coconut milk with vanilla ice cream for a tropical vacation in a glass.
Conclusion
Making a milkshake without a blender is entirely feasible with the right techniques and tools. Whether using a mason jar, hand mixer, immersion blender, or whisk, these methods allow you to create delicious and creamy milkshakes easily. Understanding the basic ingredients, experimenting with flavors, and troubleshooting common issues ensure your milkshake turns out perfectly every time. Enjoy the versatility and convenience of these techniques to satisfy your milkshake cravings, regardless of the kitchen appliances you have at hand.
